• Art Glass Resources, and some business information
  • Helpful hints and tips that we find online, in books and from our own personal experiences
  • Lots of great information for Stained Glass (Tiffany and Leaded), Lampworking, Fusing, Slumping, Glass Painting, Sandcarving, Mosaics and more
  • Lastly, HARRACH is pronounced, Hair - wreck

Monday, October 31, 2011

Homemade glass frit crusher

The other day we posted information on how to make glass frit.  Today we thought we'd share with our readers our own, very cost efficient,  method for making glass frit.  

The picture above is our homemade glass frit crusher - maker.  It was made from steel pipe found at our local home improvement store!  We added end caps on the bottom of both pipes.  The large pipe's end cap holds the glass inside of the pipe.  The smaller pipe's end cap fits snugly into the interior of the larger pipe and crushes the glass quite efficiently, AND with little force.  

This picture again shows our entire frit making set-up.  The larger pipe is about 5 inches long and the thinner pipe is about 10 inches long.  You will need the thinner pipe to be longer than the larger pipe so that you have something to hold on to when you are crushing the frit.  Look for pipes with threaded ends so that you can add an end cap.  You will find the end caps in the same location as the pipe in your home improvement store!

The glass jar is holding a sample of the frit crushed in our frit maker.  This frit was made from a brown glass bottle.  Later we sift out the larger chunks of glass so that we can use different sized frit for different applications!  We also use a magnet on our frit to make sure that there are no small fragments of steel pipe mixed in.

All together this entire set up cost us less than $20.00, including the magnet.

With a frit maker you can make your own frit to use on lampwork beads, and fused glass art.  It comes in handy for making great frit for lampwork beads,  just use all of those old short glass rods that you can no longer easily hold on to.   For fused glass art, frit can make any piece look totally unique and one of kind! Just remember that COE is still important when using frit.    

Friday, October 28, 2011

How to make glass Frit

Originally posted on WarmGlass.com (one of our favorite webpages) this information is excellent for many glass arts such as furnace glass, fused glass and lampworking.

Frit is nothing more than small pieces of glass. Generally, they are sorted by size and used in a variety of ways, the most common of which are kiln casting, pate de verre, or as a design element on sheet glass.

The easiest way to obtain your own frit is to buy it. Tested compatible frit is available from both Bullseye and Uroboros. It comes in a number of different sizes, ranging from powder to chunks as large as 1/4" (6 mm).

If you want to make your own frit, there are a number of techniques. Several are described below.
• Using a hammer
For this approach, place the glass to be used between several pieces of newspaper and strike with a hammer until the pieces reach the desired size. This method is crude but effective. Make sure you wear eye protection. Wear a mask if significant dust is produced.
• Tack fusing
Place the glass in the kiln. One arrangement that works well is to heap smaller chips of glass on a larger sheet. Heat until the glass tack fuses — around 1400 degrees F. Once the glass has fused, turn off the kiln, remove the glass (use gloves and tongs — steel fireplace tongs work well), and drop immediately into a bucket about 2/3 full of cold water. The shock will crack the glass into many small pieces. Glass broken this way will be in relatively large chunks. If you want finer pieces, you can use the hammer technique described above to break it down some more.
• Melting in a crucible
This technique requires more caution than the first two. Place the glass in a crucible, a ceramic container made for withstanding the heat of the kiln. Heat it to around 1700 degrees and soak to allow the glass to melt.

Then turn off the kiln and use tongs to remove the crucible. (Wear gloves and eye protection and take special care.) Slowly pour the molten glass into a bucket of cold water. The glass will break into finer particles than in the tack fuse approach discusses above. Make sure you return the crucible to the kiln and let it cool slowly to prevent thermal shock.
• Pipe-crushing
Obtain two hollow pipes, one slightly larger in diameter than the other so that one pipe fits inside the other. Close off one end of the smaller pipe, fill it with rocks or similar heavy items, then close off the other end.

Now place the larger pipe upright on a hard surface like cement and fill it part of the way with the glass you want to break. Slide the smaller, heavy pipe into the larger one, letting it drop full force onto the glass. (You will probably need a second person to help you hold the larger pipe.) Raise the smaller pipe and drop again and again until you are satisfied with the size of the particles. If you use this technique, wear eye protection and a mask or respirator to protect you from the silica dust. Also, you may want to use a magnet to extract any metal chips that may be caught in the frit.
• Frit-making machines
It is possible to buy frit-making machines, called "glass crushers." Alternatively, you can rig up your own machine using a garbage disposal, heavy duty blender, or similar item. Boyce Lundstrom's Advanced Fusing Techniques describes a crusher built from an old garbage disposal and a large steel drum. Kervin and Fenton'sPate de Verre and Kiln Casting of Glass also has information about building your own frit machine.

If you make your own frit, you will probably want to separate it into sizes and store it in jars or plastic bags until needed. You can separate the glass manually or you can use wire mesh screens, which are available from ceramic supply stores.

Wednesday, October 26, 2011

LavaCloth fusing texture information

Glass fusers, do you want to give your finished glass art piece a delicately woven textured-like surface but are not sure how to do it?  There is an excellent product called LavaCloth that you might be interested in!  By laying your  fused piece on top of the LavaCloth, in your kiln,  you can embed a few different types of textures into your glass art piece.  Below we have included the product information from their webpage for reference.  


Photo above from the LavaCloth webpage photo gallery.

Product Information:

1. Lava Cloth is 100% American Made, including all components, providing the highest possible quality.


2. Lava Cloth does not stick to glass, kiln shelves, kiln brick, or fiber board. Place Lava Cloth directly on the surface you wish to fire on, then place glass on the Lava Cloth and fuse.


3. Lava Cloth is non-carcinogenic. Lava Cloth is a fiberglass product with the standard warnings for fiberglass materials. These warnings are: Contact with fibrous glass many cause temporary irritation. Wear long sleeve loose fitting clothing when handling any fiberglass material. Gloves and eye protection may be appropriate in certain applications. Wash with soap and warm water after handling. Wash work clothes separately and rinse out washer. A disposable mask designed for nuisance type dusts may be advisable when high dust levels are present.


4. Lava Cloth is tan or black in color prior to firing turning white after firing. On some occasions you may have an odor and may see white powder (a silicon byproduct) on the kiln shelf with the first firing. These are non hazardous and the powder does not stick to glass. If your kiln has a glass view window you may see a white coating after several firings this simply wipes off.


5. Artists using art glass usually achieve 10 + firings at 1350 - 1485°F before the Lava Cloth starts to breakdown - it becomes fuzzy or simply breaks apart. Artists using float glass firing up to 1600°F obtain about 5 – 6 firings before breakdown. Discard used Lava Cloth in regular trash when it no longer provides the finish you wish. There is NO messy or hazardous cleanup with Lava Cloth. When one side breaks down you may get 1 - 4 firings on the backside before it breaks down.


Instructions:


1. Lava Cloth easily cuts with good scissors or a fabric roller knife, looks like a pizza cutter but is for cloth. Store Lava Cloth flat or rolled. Do NOT fold it. A tight fold will leave a crease which will not go away.


2. We recommend pre-firing Lava Cloth. This schedule works: Ramp at 500°F / hour to 1400°F soak for 10 minuets. Shrinkage occurs with the FIRST firing, a 12” square will shrink to an 11 3/8” square and a 24” square will shrink to a 22 ½” square.


3. Do NOT fire Lava Cloth above 1650 °F. Firing above this temperature glass becomes molten and penetrates deep into the Lava Cloth. You will not be able to separate the Lava Cloth from the glass. NOTE: Once glass has been fused on Lava Cloth you cannot fire polish or refuse to get rid of the texture should you want to redo the glass.


4. When fusing directly on Lava Cloth glass will expand then during the cooling down phase glass contracts. During the cooling phase the glass contracts but tends to stay in the weave of the Lava Cloth. The Lava Cloth does not move with the glass; thus the glass tends to curl upward at its edges. If you are going to slump the glass after fusing the curled edges may not matter. If you want the glass to remain flat then weight the Lava Cloth edges to hold it in place permitting the glass to retract out of the Lava Cloth weave at the edges thus stopping the curl. Small jewelry pieces usually do not curl when fired on a large piece of Lava Cloth.


5. Lava Cloth and fused glass MUST cool down to room temperature before separating otherwise the Lava Cloth will not tolerate many firings or it may even tear apart if too warm.


6. If the glass has too rough of a texture simply buff the glass with a diamond pad under running water and the roughness will easily and quickly change to a smoother texture. Some glass will sink deeper into the weave than others; this is due to variations in stiffness of the glass and varies from color to color. Fusing at high temperatures may cause the edges of the glass to be jagged.


7. If you want to reduce the amount of texture you can sprinkle dry kiln wash directly on the Lava Cloth using a flour sieve. This will fill the deeper portions of the weave and reduce the degree of texture. Then fire directly on top of this.


8. If you fire iridized glass with the iridized side down on the Lava Cloth you will get the texture plus the iridized surface will remain bright and shiny. The iridized surface is stiff and does not sink deep into the Lava Cloth. If you fire clear glass on Lava Cloth you will get a prism effect from light passing through the glass.


9. You can cut Lava Cloth into various shapes and patterns place it on top of glass with a weight on the Lava Cloth and press the texture into the top surface of the glass resulting in patterns of texture mixed with the smooth fused glass surface.


10. The textured surface will provide a good surface to glue bails or pin backs for jewelry. The textured surface will also assist mosaic artists and tile artists in gluing their glass pieces in place.


11. When box casting and lining the inside of the box with Lava Cloth provides a textured appearance reducing cold finish time.


Tuesday, October 25, 2011

Soldering tips from a pro

When we teach beginning stained glass classes we notice that quite a few of our students have issues and questions with soldering.  It is only natural!  It can be quite a daunting task for a student who has never soldered before.  I have come to the conclusion that there are two groups of new stained glass solderers, ones that get it right away and others that need to practice, practice, practice.  So today I thought I'd try to explain to new stained glass artists how to solder properly!

To begin with, you will need the correct foil, solder, flux and soldering iron.  In fact, you will also need a good work surface as well.  We solder our windows on top of a sheet of particle board which we lay on top of our work bench.  We prefer not to solder directly on top of our bench since flux will flow into and onto the work surface you will use.  Not to mention that you can scorch the surface you are soldering on.  We want to keep our work surface clean for making patterns, cutting our glass etc etc, for that reason we keep our table top flux free!

As far as using the correct foil, what we mean by that is,  using clean foil. That means foil that doesn't have the backing glue on the outer copper surface or contaminated with other materials.  If the foil is contaminated carefully clean it with either rubbing alcohol or Goof-Off.  When foiling you need to foil the pieces with equal foil on the front and back side of the piece of glass.  The foil needs to be flattened down with a fid (a flat plastic stick or even a pencil) to make a nice smooth surface for soldering.  If the foiling is flawed or sloppy, the solder job will also look flawed since you can't add additional solder to an area that doesn't already have foil.  So take your time when foiling and do a good job, or it will show later.  When soldering lead came, the came needs to be clean too.

For solder we prefer to use 50/50 solder for lead came and 60/40 for copper foil.

With flux we like to use paste flux for lead came and liquid flux on copper foil.  There are types of flux that seem to sputter when heated.  We try to stay away from those brands of flux.  They can actually become dangerous by allowing small particles of molten solder to become air born and perhaps land on skin or clothing.

We advise glass artists to use soldering irons made for stained glass.  Some irons used for circuit boards do not heat up enough to work properly.  Other irons only have small iron tips which can make it very difficult to solder easily.

Once all of the above conditions are met, it is time to start soldering.  We start soldering on the front side of the window, once completed we flip the window over, solder the back side completely, then flip the window over to repair the front where solder may have flowed from the back to the front.  We flip the window back and forth until we are happy with the soldering.  If the window is to have a zinc frame, we solder it on at this time, as well.

On the front side of the window, when we begin to solder a piece, we like to tack solder all of our glass pieces into place.  By that I mean, we like to put a little solder on every piece just to keep all pieces from moving and distorting the window's shape, as we solder.  We do butt our window up to the outer area of our work surface where we nailed two strips of wood trim into a 90 degree angle (we do this to keep our window square).  As seen in the picture below.

Photo from the Colson Stained Glass Studio


First apply the flux to the entire piece.  We use a small paint brush which can be purchased at most stained glass retailers.  When soldering you want the solder line to look rounded, not flat.  If an area looks flat, add more solder so that the solder line is rounded!  It is not necessary to solder in any specific manner, it is more important to have the correct finished look.  If you end up with rough, dull colored soldered areas, that is indicative of cold solder.  To repair an area like that, add a little more flux to the area and heat up the area with your soldering iron.  You also don't want excessive blemishes and large clumps of solder.  To repair, re-flux and re-solder.  It is not necessary to always add more solder, it is possible to just heat the offending area with your iron and correct the issue.  

When done soldering, both sides, wash off the flux.  Flux can eventually deteriorate the solder if left on the window.  We clean the flux off our windows by using a sponge with a small amount of dish detergent.  

Finally, please watch the soldering video we previously posted SOLDERING COPPER FOIL.  There are other soldering videos on You Tube and online which are excellent to watch and give hints and tips to new glass artists.


Monday, October 24, 2011

Soldering copper foil video

We found this very good video on YouTube by DelphiGlass teaching how to solder copper foil.  Click on this link to watch the Soldering copper foil video here.  It is excellent for new glass artists and others who have problems soldering correctly.  Soldering video link

Friday, October 21, 2011

Lisa Horkin, a HOT glass artist!


Today we have a treat for our readers.  We are introducing Lisa Horkin, a very talented glass blower!   You can find Lisa's work on Facebook, Horkover Glass; on Etsy, Horkover Glass; and online at Horkover Glass.

A little glass blowing history
Some of the oldest glass on record dates back to the pre-Roman times. Solid beads and amulets have been found which were made in the year 2500 BC. Even though glass has been in existence for thousands of years, it wasn’t always considered an art as it is today. Its uses, for the most part, have been in functional pieces – things that hold things. During the pre-Roman times, glass makers were making vessels, but glass blowing had not yet been invented. The vessel was made by wrapping hot glass around a core made of clay and dung. Sometimes the glass maker would add color after the first clear layer was in place. After the glass cooled the core could be picked out, leaving what glassblowers nowadays call a vessel. Some of the earliest vessels date back to 1500 BC in Mesopotamia and Egypt. During that time glass was not yet a common household object. Few people knew how to make glass, and only the pharaohs, high priests and nobles owned it. Both Middle Easterners and Egyptians were making mosaics out of glass. They would fuse rods of colored glass together to make a pattern. The resulting larger rod would then be heated and pulled out, causing the design to become smaller. Afterwards it was sliced and arranged into a mosaic. Knowledge of glass spread outward from Egypt and Mesopotamia mostly through the means of trade and conquer. Egyptian and Mesopotamian glass that dates back to the pre-Roman times have been found in the Mediterranean, Russia and France.

Lisa's biography:
I am an Ohio artist and have a BFA,in college I majored in
painting and took ceramics as well as some glass.
For years I worked in painted textiles exhibiting, lecturing,
and teaching. Since 2002 I have been using glass as
means of creative expression. I blow glass primarily in a
local public glass studio where I rent space I also have a
small studio in my home.

I am inspired by the color and the properties of glass itself,
and by my past experience of working with oil painting and
textile mixed media. My motivation is an inner drive that
I have always felt. As a 3 yr old it was the smelling and
feeling the squishing paint thru my fingers as I smeared it
around on wet paper. At five it was the feel of pounding
a nail and it sinking into a piece of scrap wood to build
a “ship” and the job of painting my ship to boldly stand out.
Now I experience peace, calm, happiness, and
excitement manipulating molten glass. Blowing glass has
become a huge lesson in how to “go with the flow” Some
days the glass is moving with me and other days I have to
give in and move with the glass. 


 Lisa's "Red and Black Vase"

 Lisa's "Calla lily"
Lisa's "Green Fall"

Lisa's "Curry and Strawberry bowl"


Wednesday, October 19, 2011

Firing contours

When you are looking for kiln firing schedules, you will always find these three different types of schedules in books or online.  Most glass manufacturers have their own temperature ranges to follow to achieve these three contours, so it's best to check with each individual manufacturer.  Don't forget to take firing notes to keep track of what works best for you and your kiln.  

Now when you are new to fusing, you might be confused as to the difference between tack fusing, contour fusing and full fusing.  We thought we'd write a little about these three different techniques today.

Tack Fuse 1350º- 1370º

Contour Fuse 1400º-1450º

Full Fuse 1460º- 1480º

The tack fuse contour comes in handy when making pendants or other glass art where you want multiple layers to look as though they are only laying on top of others.  It can look nice when done with dichroic glass tack fused on top of a non dichroic base glass.  Also when you need to lightly fuse multiple elements together, without melting down (and melting together) the entire piece, you will want to use a tack fuse schedule.  If you have a piece that will need many firings and you want all pieces to keep their original shape when completed, it helps to tack fuse the pieces until the last firing.  Remember, the thicker the piece you want to fuse, the slower you need to heat up the piece until you get to the final heat desired!

The contour fuse is a more rounded off version of the tack fuse.  The edges are not squared like what happens when tack fusing.  

A full fuse completely melts down multiple layers of glass so that the piece looks flat and seamless.  When making pieces like dishes and bowls, etc. that have multiple design elements placed side by side, typically laying on top of one piece of base glass, you should full fuse the piece first before slumping into the mold you intend to use.

Finally, a little info about slumping glass into or over a mold.  It is possible to slump and fuse a piece at the same time.  If a piece has a lot of design elements, some of which could possibly move when slumping, it is best to fuse first before slumping.  To slump you will need to heat your kiln up to between 1200 and 1300 degrees Fahrenheit.


Tuesday, October 18, 2011

Flashed Glass - an introduction

Author: Rick Martin
Posted:
Revised: August 03, 2005
Traditionally, flashed glass was produced for the art glass trade to provide a cheaper method of making colored glass panes ie.one could layer a thin coating of color on an inexpensive base of clear glass, the finished product when held up to the light was practically indistinguishable from solid color glass. Red flash was the first most commonly used due to the expense of producing the red pigments, the purest red was often too dark and flashing also helped lighten the color, gold powders providing the best reds. Many other colors blues and yellows were also produced, more so than today, though having said that, over the years I’ve collected a good selection of flashed colors.
These mouthblown glasses attain their coloration through the "flash" technique of glass blowing. One or more colored glasses are applied to a clear or colored base glass referred to as the "carrier glass". This method makes possible a great variety of glasses. Multicolored glass, glass with shading, cloudy or torn glass, seeded glass, multicolored flashes and streaky all may be produced using this method. White "milk" or opal glasses are made color flashed on opaque or translucent carriers, these obscure views but allow light transmission, useful in cases such as landing windows where light levels are factors to be considered or privacy windows and doors.
 

Production

The first step is to pick up the molten flash color with the blowpipe. The shape of this initial gather determines the final appearance of the flashed glass. A round balloon results in even flashing throughout the sheet, a pear shape gentle shading and a "notched" mass creates the "torn" appearance. The base color glass is then gathered over the carrier flash color gather and blown out into cylinder shape. Throughout the process, the glassblower must consider the final intended appearance of the flash. After the blowing of the cylinder, the steps of production are identical to those of Genuine Antique Glass. The precise control of form and color of the flash requires considerable experience as well as the skilled craftsmanship of the glassblower”
Nowadays flashed glass is still in production though on a very small scale, and now ironically the mostexpensive of all art glass, doubtless due to the expertise and intense labor involved in making the larger commercial sized panes it is usually supplied in. 80 X 100cm approx. The main commercial sources remain the St Gobain, and Lamberts though other smaller private sources exist.
St. Just
Produce a range of mouth blown glasses from France. This manufacturer being acknowledged as making the best flashed glass available. This is due to a very thin layer of flashed color which results in easy and controllable aciding to lighten or (sandblast) remove this color. Sheet size varies 730mm x 860mm (29" x 34").

Lamberts German
This Glassmaker Lamberts in Waldsassen in 
Germany is another of the few remaining production sites of handcrafted, mouth blown flashed sheet glasses.
 
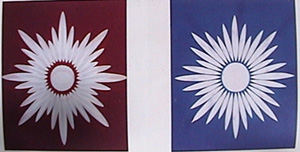
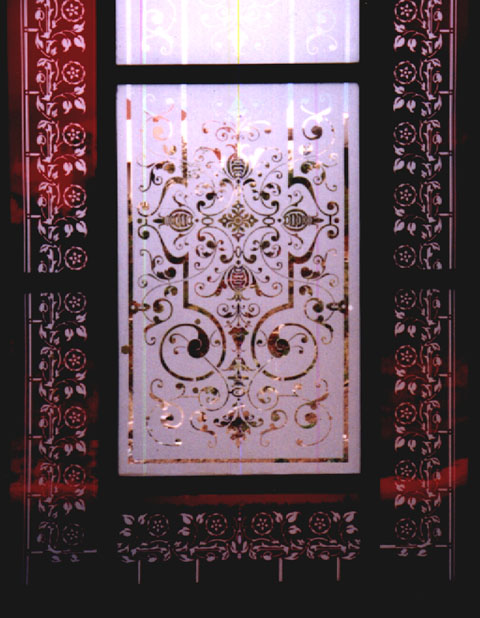
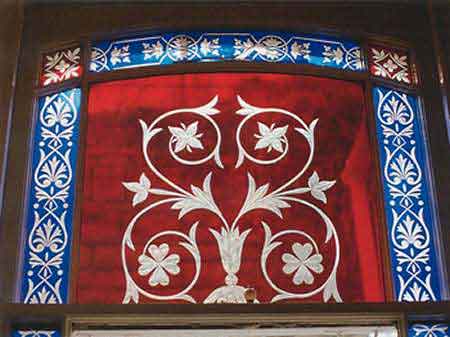
Fine line carving on blue/green flashed

Working with flashed glass

Early and present day uses in stained glass studios were to achieve high detail in heraldics etc, or the fine details of flowers, simple brilliant cutting, flash lines and star flashes etc were used up to the 30’s-40’s in the UK. These are still commercially available in small square decorative styles generally used as corner insert pieces and mostly in restoration work, commercially acid etched border panels for simpler door & small window work were once available. Flashed glass is of course also used in traditional Leaded stained glass work for its special qualities and in certain areas, for effect.
  

Traditional commercial panels

To achieve controlled tonal effects on flashed glass diluted Hydrofluoric acids were traditionally used.
Carefully timed biting or rotting down through the flashed layer washing off when the required tone was reached provided one with a choice of tones between the flashed layer and the base color, these tones become critical when biting the last microns of depth. One must observe carefully and flood-wash off the areas when the desired tone is reached. It is a great loss that it is an almost abandoned process nowadays, due mainly to the inherent dangers of working with HF acid.
For the sandcarver working with stencils one must take care of flashed layer depth, as it often varies, mostly depending on the cut of sheet, at times one can carve to 0.5-1.7mm before reaching base color and extra care must be taken at every stage as the glass can vary in overall thickness. It is not advisable to work on single large panels as flashed glass is not always flat, rather one should economize on the glass sizes within the design, this can add to effective contrasts, leaving room for other mixed surface techniques.


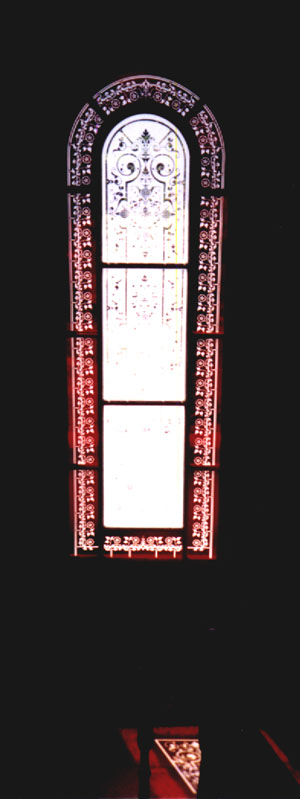
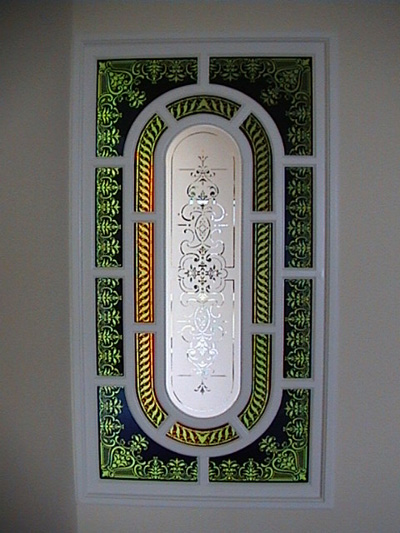
Examples of Recent Antique flashed glass windows by the Author

Modern Day uses

Using antique flashed glass in the creation of windows certainly gives the sandblast craftsman the added  pleasure of bright solid color to work with in combination with a secondary base color.
The main set back will always be the cost as this fine glass is amongst the most expensive available. For decorative work on a larger scale one must acquire and inspire patrons prepared to invest and who appreciate the value of such decorative windows as an investment in beauty for their homes.   
I hope this overview may be of some help to see the decorative potentials of carved flashed glass use in modern homes and hasten its return as a decorative alternative.
Rick Martin (Madeira 2004)

Monday, October 17, 2011

Installing stained glass in a door


We found this installation information on the webpage Betterstainedglass.com and thought we'd share this posting with our readers today.  Occasionally we notice, when reading through art glass forums and bulletin boards, new glass artists asking how to put a stained glass window in a door.  Unfortunately we have also read a lot of incorrect comments and suggestions in these forums, mainly safety issues.  For that reason we thought this article is extremely important for any glass artist contemplating putting a stained glass window in a door!

Tempered glass needs to surround decorative glass used in a door. This protects people from injury if the glass is broken and it also serves as a barrier against heat loss during cold months. Tempered glass must be ordered in advance and once its been tempered, it can't be cut or ground.
#1 Here the panel is lightly cleaned to get any dust off of it that may have collected after you take it to them. They only do a light cleaning, you are responsible for making sure that it is as clean as possible when you take it to them.
#2 Next, the tempered glass is sent through a machine which "super cleans" and dries it.
#3 The stained glass is next laid out on one sheet of the tempered glass. It is centered and there is a gap on each side and top and bottom of 5/16" (the size you subtracted from your finished size when building your panel). 
#4 Now, a sticky backed, foam tape with a metal skin is applied to the stained glass panel and the tempered glass below. It sticks to both pieces and holds them firmly. 
#5 The metal tape is scored on each corner so it can be folded around the corner with a sharp clean edge. The tape can vary in width, this tape is 1/2", (we recommend 1/4" since the air gap will be less noticeable and the final width of the piece will be 1/2" total.
#6 Laying the second sheet on the foam tape requires help because they only get one chance to do it perfectly. Once the top sheet touches the tape, it's stuck. For this reason, you should always allow for an extra 1/8" in the finished opening of your door, in case the two sheets are slightly misaligned. 
#7 Finally, the completed "sandwich" of glass is clamped in a table and hot Butyl rubber is forced between the two sheets of tempered glass and filling the gap between the two. This covers the foam tape completely. 
#8 Here, the completed window is ready for the customer to pick it up and to install it in their door. 
Finally, the completed panel is installed in the door and it looks great!
To correctly size a window, we recommend the following:
The decorative panel should be sized 1" smaller than the actual opening in the door. This allows there to be enough space for foam tape in the bottom of the opening to support the window and for silicone in the sides and top to hold the panel securely. The tempered glass (ordered in advance from the glass company) should be 1/8" smaller than the actual opening on each side or 1/4" smaller in total.
The window trim must be 1/2" or greater on each side. This will allow any slight gaps between the foam tape used when applying tempered glass to the decorative panel to be covered by the trim.
The drawing below shows the exact measurements that our local glass friends tell us to build panels to. You should check with the glass shop you'll be working with to see what their sizing recommendations are.
Stained glass artists often choose to have their glass encased in between two pieces of tempered glass and sealed with Butyl rubber. This forms an insulated unit which surpasses minimum building codes and is easy to clean by cleaning crews when glass is installed in a commercial setting.

Sunday, October 16, 2011

Tutorial - Intro to Enameling

We hope you check out this excellent tutorial on enameling. It was posted on the Copperheart Designs blog and is full of valuable information for anyone thinking about getting into enameling.


It may be a cliché, but enameling is one of those techniques that takes a minute to learn, but a lifetime to master. If you've ever wanted to try enameling, don't be intimidated, it's very easy to get started. Enameling is great because you can get very satisfying results right away, but with practically endless enameling techniques to try, you will never get bored! This tutorial will teach you the basic first steps of enameling- how to fire a coat of enamel onto a flat metal piece.

Enameling is the art of fusing glass to metal. The basic procedure for enameling is to apply the enamel to clean metal, and heat the piece either in a kiln or with a torch to a temperature of 1500 degrees or so, until the glass enamel melts and fuses to the metal. Enamels come in powdered and liquid forms, but powder is more commonly used because it is easier to apply and comes in a wider range of colors. Enamel can be fused to gold, fine silver, copper, and steel. You can enamel on sterling silver too if you depletion gild or "bring up the fine silver" first, but that would be a whole different tutorial. I would recommend starting with copper, because it is very inexpensive compared to gold and silver, and it is very easy to work with.

Safety: The main safety issue when working with enamels is the heat. Make sure you are firing away from flammable materials, on a heat proof surface. Don’t leave your kiln unattended when it is hot. If you are using a larger kiln, you will want heat proof gloves to protect your hands. Wear tinted safety glasses to protect your eyes from the light of the torch or kiln. If you are sensitive to dust, you may want to wear a dust mask when sifting enamel.

Materials:
-Copper sheet, 18 or 20 gauge and jeweler's saw or disc cutter to cut out shapes
OR
-Precut copper shapes from an enamel or jewelry supply company
-80 mesh enamels- you can get enamels from various places, but I like Thompson Enamel
-Holding agent- this is an organic gum solution that acts as a sort of glue to hold the enamel powder on the metal
-Sifter- you can buy these in various sizes from enamel supply companies or make your own by cutting the bottom out of a plastic cup and gluing in a piece of fine screen
-Jeweler's file
-Tweezers
-Ball Clay or Scalex (optional) - This is a clay slip like substance used to coat the un-enameled side of a piece during firing.
-Pickle Pot and Copper Tongs- to clean metal
OR
-Pumice powder, scouring powder, or commercial metal cleaner to clean metal.


For Kiln Firing:
-Kiln- there are two basic types of kilns. The cheaper kind (which I have) is called a beehive or hotplate kiln. It's basically a heating element set inside a round chamber with a domed lid. This kiln is great for doing small pieces, but it does have its limitations. The other kind of kiln is like a little oven with a door that opens in the front. These can accommodate larger pieces, and you can get them with fancy features like temperature controls and shutoff cycles.
-Metal Spatula or fork- for moving pieces in and out of the kiln
-Firing Supports- Trivets and/or wire screens. The firing support should hold the enamel while firing and allow you to transport the enamel piece in and out of the kiln with your spatula. The trivet is made with three or more angled metal arms that hold the enamel by its edges. Some trivets have built in legs so you can slide your spatula under them to move them. Some trivets don't have legs and need to be placed on a wire mesh firing screen with the corners bent down. You can also improvise a piece of steel with bent down corners to set your trivets on (see the firing photos below)


For Torch Firing:
-Torch- Any kind of torch used for jewelry making will work. I use a super basic propane torch from the hardware store. It's inexpensive and convenient, but doesn't get hot enough to fire pieces larger than 1" in diameter. Acetylene and propane/oxygen torches get hotter, and can fire larger pieces.
-Firing supports- Trivets. For torch firing you need something you can get your torch under to fire the enamel from below. A tall enough trivet will work or you can get a tripod with a mesh screen on top and set your trivet on that.

Preparing the metal:
-Cut the shape you want out of copper sheet, or use a precut shape.
-If you want to dome or otherwise form the metal, do it now.
-Clean the metal- I find the best way to do this is to heat the metal to a dull red with a torch to burn off all the dirt and oil, and then pickle it. Otherwise, you can scrub your metal with pumice powder or household scouring powder, or use a commercial copper cleaner. Once your metal is clean don’t touch it! The oils from your fingers will prevent the enamel from adhering properly. Use tweezers to pick up the metal.

Sifting the first coat:
-You will want to enamel both sides of your metal. The enamel on the back of the piece is called the counter enamel. If both sides of the piece will be visible when finished, choose an appropriate color. If the back will not be seen, you can use mixed odds and ends of enamel.
-When firing the first coat of enamel, the other side will be blackened by the heat of firing. There are two ways to deal with this. You can use ball clay or scalex to coat one side of the metal before applying enamel to the other side. This is a sort of clay like product that protects the metal during firing. You just paint it on and after firing it flakes off the metal. Otherwise, you can just enamel one side and then pickle the piece to remove the oxidation from the bare metal. I prefer this method, because it seems to work better and it’s less messy.
-Holding your metal in a pair of tweezers, either spray or paint on a thin layer of holding agent. You want just enough to hold the enamel powder onto the metal, not a big puddle.
-When sifting the enamel, you can set the metal piece on a piece of glossy magazine paper to catch the extra enamel. If you are making a larger piece, it helps to put a something under the metal to lift if up off the paper and make it easier to pick up. A soda bottle cap works nicely. Otherwise, you can hold the piece in a pair of cross-lock tweezers directly over the jar of enamel while you sift. I like to do this when making small pieces.
-Put some enamel in your sifter, and gently tap the sifter with your finger to springle enamel onto the metal. You want to apply a thick enough layer of enamel to cover all the metal, but not too thick. It might take a few tries to get it just right, so do some experimenting.
-Once the enamel is applied, let the holding agent dry completely before firing. If you try to fire a piece before it is completely dry, the liquid will boil away causing enamel to pop off of the piece. If you are kiln firing, you can set the piece on its firing support on top of the kiln lid to dry. If you are torch firing, you can set the piece on its firing support and very carefully heat it from below to dry it.


Kiln firing:
-Use your spatula to transfer the piece on its firing support into the kiln. Firing times vary depending on the enamel color, the thickness of application, and the size of the piece, so you can’t really time the firing. Take a peek every so often to see how the piece is progressing. First the enamel will start to melt into an orange peel texture, then it will fuse fully and smooth out.
-Once the enamel is fully fused, use the spatula to remove the piece from the kiln. Let it cool on its firing support


Torch firing:
-With the enamel piece on its firing support, heat the piece from below with your torch. The enamel will blacken where the torch hits it. You will be able to see the progression of the enamel melting and fusing to the metal. Even if you are using a kiln, I would recommend torch firing a piece to get a better understanding of what happens during the firing process.


Sifting additional coats:
-File the edges of the metal to remove any oxidation or stray enamel. You will need to do this after each coat you fire.
-Clean the un-enameled side of the metal thoroughly.
-Sift a coat of enamel onto the un-enameled side.
-Dry and fire as before.
-Continue to apply coats of enamel until you are satisfied with the appearance of your piece. Chances are your first coat won’t look so great. It may be uneven or bumpy. As you apply more enamel, you will get more even colors and a smoother surface. Three coats of enamel will usually give pretty good results. Try layering different colors of enamel. Experimentation is key when learning how to enamel, so get yourself a bunch of little pieces of copper and go to town.

Friday, October 14, 2011

Kiln problem, messed up thermocouple

Today I had our Evenheat kiln all set up to start fusing a piece that we're working on, but when I went to turn on the kiln and start up the program, the Rampmaster II controller said FAIL!  I also noticed that the kiln was displaying the temperature inside of it at times as high as 2000-3000 degrees.  Since the kiln was completely cool at that time and the location where it's at is only about 70 degrees, something major was wrong.

our Evenheat kiln setup


Like always I went searching online for an answer to this issue.  We are in the process of moving our store, Harrach Stained Glass out of state so I have packed away the kiln manuals and paperwork.  For some reason there isn't a lot of info on this issue online.  The Evenheat webpage doesn't give me a whole lot of information either.  Luckily it did have an error code section so I found that FAIL, is the code for a thermocouple issue.  I also thought I'd check to see if I blew the fuse on the side of the controller but I still can't figure out how to remove the darn thing!  The cap on the fuse seems to be frozen.

Anyway, the best I could come up with was that the thermocouple is the culprit.  Last week I removed my kiln shelf when working on a tall fused piece, so perhaps I bumped the thermocouple while removing the shelf.  The thermocouple is that little part, inside the kiln, that sticks out into the interior side of the kiln by the rampmaster.  I did discover that there is a thermocouple cement that I can buy from Evenheat!  And I'm going to look for it and buy it asap.

thermocouple seen on lower section of kiln in picture above

 thermocouple seen sticking into kiln on the right side in picture above

Yea, the kiln is actually back up and running.  I wiggled the thermocouple and tried to lightly push it back into the kiln wall and suddenly I noticed that the temperature reading was once again reading the correct room temperature.  Basically, now I've been keeping a close eye on it this morning to make sure it doesn't go haywire and perhaps overheat.

kiln in process of heating, thermocouple seen on right

Our studio has had this Evenheat Kiln for more than ten years and this is the first time we've ever had any problems with it.  If anyone is ever wondering what kind of kiln to purchase, we highly recommend Evenheat Kilns!  We don't know what we'd do without this workhorse kiln!  We love it.

Below we posted the link to the RampMaster II manual.  
Evenheat Kiln Inc. RampMaster II Glass Manual

Thursday, October 13, 2011

Step by step fusing project by Danielle Moore

Today we are lucky enough to get to share with our readers these wonderful fused glass pieces that were made by Danielle Moore from Hanging Valley Art Glass, http://www.hangingvalleyartglass.com. We especially love how Danielle documented, with such excellent photography,  every step in her fusing process!   

So now in Danielle's words....

I was asked to design a series with sea turtles as a Birthday gift by a dear friend.

I began with starfish; these are starfish 'bodies' scattered about for the large 12" x 12" platter.

Placing starfish on their foreground for measuring the underwater 'beach'.

Once I figured out the size of the 'underwater beach' for the starfish, I cut it and began adding design elements of the reef and turtle shells. This was a 'design' as I went project - what fun!

Progress on the 12" x 12" platter; each piece individually and custom cut to meet 'the vision'.

Love is in the air...I laid the glass sheet on the last previous shot (once the turtles had their heads!) and drew the heart cut out-water shapes on clear green glass.

After cutting the heart shape and water shapes for the ocean water and placing them on the platter blank.

I added baby sea turtles to represent these two love birds children!

I filled in the empty space on the platter with 4 types of fit for extra depth.

Love turtle detail pre-fire.

Fire 1 complete! In this photo, the blank is ready for slumping and is returned to the kiln, sitting on top of the mold that it will relax and take shape.

Finished piece! Love the rainbowy iridescence reflecting in the light - it's electric!

At a different angle, the glass appears quite transparent.

The beginning of the accompanying 8" x 8" plates.

Cutting reef.

Designing and cutting water.

Love the bubbles going up the sides of the reef! I was not happy with the color of the turtle and eventually traded it out for the black shell with brown legs and head.

Adding frit...

Both plates on the kiln shelf and ready for firing!

Almost finished! Another fused, blank ready for slumping. I added the design on the shell before another firing on plate 1.

Fused blank - plate 2.

And...drum roll...final slumped plate 2!

Nice!

Final plate 1 - the iridescence on this plate took on a smooth, settled water like appearance.

The three piece set! The two turtles on the small plates represent each adult turtle swimming individually. I used the same turtles on the platter, added the 'child' turtles and heart to represent them coming together.


SEARCH FOR ART GLASS INFO!

Follow Our Blog

Blog Archive

These are some of our most popular subjects

50/50 solder (2) 60/40 solder (2) Borax (2) Boron Nitride spray (3) Bullseye (5) COE (11) Dalle de Verre (2) Didymium glasses (2) Effetre (2) Evenheat (4) Glass Eye 2000 (2) Moretti (3) Morton System (3) Primo Primer (3) RampMaster II (2) Tiffany (5) YouTube (85) air bubbles (5) annealing (6) art glass (10) bead (8) beads (6) bottle (8) breaking glass (2) broken pane (2) came (2) carbide wheel cutter (2) casting (10) cement (10) chat (1) color (2) compatible (2) compatible glass (4) contour fuse (2) copper (4) copper foil (7) crushed glass (3) cutting (8) cutting circles (2) cutting glass techniques (2) dalles (3) design (7) devitrification (5) devitrification spray recipe (2) dichroic (9) digital controller (4) dots (4) drill hole in glass (3) enamel (6) enamel paints (2) encase (3) epoxy (2) etching (5) faceted glass (3) fiber paper (7) fid (2) fire brick (4) fire polish (2) fire safety (2) firing schedule (26) flashed glass (2) flux (8) foil (7) frit (25) full fuse (6) furnace glass (3) fused glass (26) fusing (72) glass (33) glass bead (5) glass blowing (3) glass bottles (5) glass casting (9) glass clay (3) glass cutter (8) glass cutting (4) glass kiln (10) glass painting (18) glass powder (6) glass rod (9) glass stain (3) glue (3) grinder (3) grinder bits (2) grout (2) hake brush (2) harrach glass (158) hot glass (5) hot head (3) how to set up a torch (2) jewelry (4) jewels (3) kiln (106) kiln furniture (3) kiln schedule (20) kiln shelf (3) kiln wash (15) kilns (7) lampwork (47) lampwork press (2) lampworking (8) lead came (11) lead knife (3) leaded glass (12) mandrels (4) mold (13) molds (17) mosaic (6) oxidation (1) pate de verre (5) patina (2) pattern (5) pattern bars (6) pendant (7) pot melt (5) powder (1) presses (3) reactive colors (2) recycled glass (9) reducing flame (2) repair (10) resist (6) restoration (3) reusche (5) safety (7) sandblasting (6) schedules (4) score glass (3) sheet glass (5) shelf paper (4) shelf primer (6) slumping (14) soft glass (4) solder (10) soldering iron (4) stained glass (22) stained glass window (7) steel mold (3) stringer (6) supplies (4) tack fuse (4) thermocouple (5) tools (5) torch (13) tutorial (76) video (88) wine bottle (16)

Search tags from previous posts here!

104 coe (1) 220 volt (1) 50/50 solder (2) 60/40 solder (2) Aanraku Frit Maker (1) Aanraku Frit Sorter (1) abrasive (1) accent (1) acids (1) advertise (6) agreement (1) air bubbles (5) air compressor (2) aluminum oxide (1) android (1) annealing (6) aperature pour (1) app (1) Arrow Springs (1) art (3) art glass (10) ArtGlass Clay (1) artist (2) avatar (2) Banner (2) bar code scanner (1) Baroque (1) base metals (1) bead (8) bead door (1) bead release (1) bead release recipe (1) beads (6) beer bottle (4) bending glass (1) Bethlehem (1) Betta (1) betterstainedglass.com (1) bevels (1) bgartman (1) billet (1) billets (2) bisque (1) black (1) black backed foil (1) Blenko (1) blog (7) blogger (3) blowing (1) Bobcat (1) books (2) Borax (2) Boron Nitride spray (3) Borosilicate (1) bottle (8) bottle cutter (3) bottle glass (1) bottles (1) boxing (1) brass (1) brass frit (1) breakers (1) breaking glass (2) brick and mortar (1) broken pane (2) bronze (1) building owner (1) Bullseye (5) Bullseye powder (1) Bullseye reactive glass chart (1) business (6) business license (3) butterfly (1) buy (1) cabbage leaf mold (1) came (2) came bender (1) came saw (1) camera (1) candles (1) candy dishes (1) cane (1) Canterbury Cathedral (1) carbide wheel cutter (2) Carlisle (1) Cast-A-Cab Molds (1) casting (10) Cathedral glass (1) Catspaw (1) Celsius (1) cement (10) cement recipe (1) ceramic kiln (1) ceramic mold (1) chain (1) change shop name (1) Chantal's stained glass (1) chat (1) Cheetah (1) Chestnut Ridge Designs (1) chunk glass (1) circle (3) clashing (1) clay (2) clean (1) cleaning copper (1) clove oil (2) cmc (1) CMC powder (1) coaster (1) Coatings by Sandburg (1) COE (11) COE testing card (2) color (2) color wheel (1) Colour de Verre molds (2) commercial (1) compatible (2) compatible glass (4) competition (1) compounds (1) conservation (1) contact paper (1) contour fuse (2) cookie cutters (1) cool (1) copper (4) copper backed foil (1) copper foil (7) copper foil mil (1) copper sulfate crystals (1) copper wire (1) cord (1) Corinabeads (1) Corning Museum of Glass (2) corporation (1) cracked pain (1) crackle glass (1) cracks (1) crafts (1) craigslist (1) Creative Paradise molds (1) Creator's Premium Bottle Cutter (1) Crowley (1) crushed glass (3) curdled (1) custom ceramic molds (1) cut outs (1) cutting (8) cutting bottles (3) cutting circles (2) cutting glass techniques (2) cutting oil (1) cutting square (1) Dalle de Verre (2) dalles (3) dam (1) Danielle Moore (1) decals (1) Delphi Glass (1) design (7) devitrification (5) devitrification spray recipe (2) dichroic (9) Dichroic Extract (1) Didymium glasses (2) digital controller (4) disk bead (1) display (1) disposal (1) distorted fused glass shape (1) domain (1) door (1) Dos and Don'ts (1) dots (4) dragon scale bead (1) drapery glass (2) draping (1) drawing (1) Dremel (2) drill hole in glass (3) drinking glasses (1) drop out ring (1) dust collector (1) dusts (1) dykes (1) earrings (1) Effetre (2) electric kiln (1) electric kiln sitter (1) electricity (1) element (2) elements (2) elmers rubber cement (1) enamel (6) enamel label (1) enamel paints (2) enameling (3) encase (3) encased (2) English Muffle (1) engrave (1) entrepreneur (4) epoxy (2) equipment (1) etching (5) Etsy (7) Etsy card reader (1) Evenheat (4) evenheat kiln (1) expenses (1) exposure (1) facebook (6) faceted glass (3) Fahrenheit (1) fan page (1) favorite item from the shop above you (1) feathered lampwork bead (1) feature your artwork (1) fiber board (2) fiber paper (7) fid (2) fire brick (4) fire polish (2) fire safety (2) firebrick (2) firing schedule (26) first firing (1) fit glass window to frame (1) flash (1) flashed glass (2) Flexi-Glass (2) float glass (1) floral former (2) flower (1) flower pots (2) flux (8) foil (7) foil shears (1) follower (1) following secrets (1) font (1) font generator (1) for sale (1) forum (1) Fracture and Streamer (1) frame (1) Frantz (1) free stained glass patterns (1) freeze and fuse (1) frit (25) frit casting (1) frit casting molds (1) frit crusher (1) frit sorter (1) front load (1) full fuse (6) fumes (1) furnace glass (3) fuse (2) Fuse It Test Card (1) fused (13) fused glass (26) fused glass decals (1) fused hearts (1) fused lamp (1) Fusemaster (1) fusible (2) fusing (72) fusing book (1) fusing medium (1) gain followers (2) garnet (1) general proprietorship (1) generator (1) gift (1) gigabytes (1) gingerbread man (1) Glaskolben (1) glass (33) glass bead (5) glass beads (3) glass blowing (3) glass bottles (5) glass burrs (1) glass casting (9) glass clay (3) glass cutter (8) glass cutting (4) glass cutting safety (2) Glass Eye 2000 (2) glass kiln (10) glass log (1) glass nippers (1) glass painting (18) glass powder (6) glass rod (9) glass saw (1) glass stain (3) glassline paint (1) glazing hammer (1) glue (3) Gluechip (1) goddess (1) google (1) grain (1) grinder (3) grinder bits (2) grinding glass (1) group (1) grout (2) grozing (1) Gryphon (1) Gryphon bandsaw (1) Gtt Cricket (1) gum arabic (1) haike brush (1) hake brush (2) Hakko (1) handkerchief mold (1) hang (1) hanging hook (1) Hanging Valley Art Glass (1) harra (1) harrach glass (158) harrachglass (2) hazardous waste (1) history (1) hobbies (1) holding agent (1) hollow bead (1) home made frit (2) home owners association (1) Horkover Glass (1) horseshoe nails (2) hot (1) hot glass (5) hot head (3) hot working (1) house sign (1) how to (2) how to clean (2) how to open a new store (1) how to set up a torch (2) HTML (2) IGGA (1) incompatible glass (1) info appearance (1) Inland (1) installation (2) insurance (1) internet (3) iPhone (1) IR damage (1) Iridescent (1) iridized (1) ivory (1) japan drier (1) jar (1) jars (1) Jennifer Geldard (1) jewelry (4) jewels (3) joist (1) jump ring (1) Kaiser Lee Board (1) Kalera Stratton (1) Katie Gee Designs (1) kiln (106) kiln book (1) kiln furniture (3) kiln lid (1) kiln repair (1) kiln schedule (20) kiln shelf (3) kiln wash (15) kilncasting (1) kilnformed (1) kilns (7) Knight Bullet (1) Kokomo (3) Kokomo glass (1) label (3) Lamberts (1) lamp (1) lampwork (47) Lampwork Etc. (3) lampwork press (2) lampworking (8) lampworking frit (1) landlord (1) LavaCloth (1) lavender oil (1) layout (1) lead (4) lead came (11) lead knife (3) lead nippers (1) lead shears (1) lead vise (1) leaded (1) leaded glass (12) lease (2) leaves (1) lids (1) limited liability company (1) limited liability partnership (1) limited partnership (1) linseed oil (1) liquid stringer (1) liquid stringer medium (1) Lisa Horkin (1) live (1) location (1) lost wax casting (1) Lynx (1) magazine (1) Magic Mender (1) mandrel size chart (1) mandrels (4) manual (2) manufacturers (1) market (1) marketing (1) measure (1) melting points (1) merchant service (1) metals (2) microwave (1) microwave kiln (2) minerals (2) mini phaser (1) mirror (1) mold (13) mold mix 6 (1) molds (17) Moretti (3) Morton board (3) Morton System (3) mosaic (6) mosaic history (1) mouth blown (2) MR-97 (1) Mr. Splash (2) Muff (1) Murano Italy (1) muriatic acid (1) Mustang Dawn (1) Naos (1) needle nose (1) negotiate (1) net (1) network (1) network team (1) neutral flame (1) neutrals (1) newspaper (1) NNN (1) no days liquid fusing adhesive (2) noodles (2) Nortel (1) nuggets (2) off mandrel (1) oil based (1) online (1) onsite (1) opalescent glass (1) opaque glass (1) organizations (1) outlet (1) oval (1) oxidation (1) oxides (1) oxidizing flame (1) oxygen (2) oxygen concentrator (1) packaging (1) paint (3) panel (2) paradise paints (1) Paragon (2) parts (1) pate de verre (5) patina (2) pattern (5) pattern bars (6) pattern shears (1) patterns (3) Patty Gray mold (1) paypal (1) Pebeo (1) peep hole (1) pen (1) pencil grip (1) pendant (7) pendant mold (1) permits (1) petals (1) Peter McGrain (1) Phantom (1) photography (4) pine oil (1) Pinterest (1) Piranha (1) pistol grip (1) plaster (5) plastic beads (1) plating (1) Play Doh Fun Factory (1) pmc (1) pocket vase (1) poison (1) posts (3) pot drop (1) pot melt (5) powder (1) power cord (1) preparing kiln (1) presses (3) pressure blaster (1) pressure pot (1) pricing (1) primary colors (1) Primo Primer (3) printable (1) profile (2) program (3) programmable (2) propane (3) proper clothing (1) propylene glycol (1) psi (1) punty (1) purple (1) putty (2) putty recipe (1) pyrometer (3) qr (1) qr code (1) rain drops (1) raking (1) raku (1) ramp (1) rampmaster (2) RampMaster II (2) reactive colors (2) recipe (1) rectangle (1) recycle (5) recycled glass (9) Red Max (1) reduce air bubbles (1) reducing flame (2) reference (2) relay (2) rent (1) repair (10) residential (1) resin (1) resist (6) resources (1) restoration (3) retail (4) reusche (5) reverse painting (1) Rio Grande (2) rod (1) rod storage (1) rods (1) rondels (1) roulette tool (1) round bead (1) rubber (1) rubber cement (1) rubbing alcohol (1) running pliers (1) s hook (1) safety (7) safety glasses (3) Sairset (1) sand (1) sand blaster (4) sand blasting (5) sand carving (4) sandalwood amyris oil (1) sandblasting (6) Sandblasting abrasives (1) sander (1) saw (1) schedules (4) score glass (3) scoring glass (1) scrap glass (1) Scrap Master (1) screen printing (1) secondary colors (1) sections (1) secure server (1) Seed beads (1) segments (1) sell art work (1) sell crafts (1) service provider (1) serving plates (1) shapes (1) shards (1) sharpie marker (1) sheet glass (5) shelf melt (1) shelf paper (4) shelf posts (1) shelf primer (6) shipping (1) shop (1) shop announcement (1) shop languages (1) shop name (1) shop policies (1) shop profile (1) shop settings (1) shop title (1) sifter (1) silicon carbide (1) silicone mold (2) silicosis (2) silver (2) silver backed foil (1) silver foil (1) silver stain (2) silvered ivory (1) sink (1) sis (1) Skutt (3) slump (8) slumping (14) Slumpy's (3) small business (3) snowman (1) social media (3) soda lime glass (2) soft glass (4) software (3) solder (10) soldering iron (4) sole proprietorship (1) spectrum (1) Spectrum system 96 (2) Squeegee Oil (1) St. Just (1) stained glass (22) stained glass painting (1) stained glass pattern books (2) stained glass patterns (2) stained glass studio (1) stained glass window (7) stainless steel mold (4) stains (1) stamps (4) steel mold (3) steel pipe (1) Steider Studios (1) Steider Studios Glass Medium (1) stemware (1) stencil (3) stepping stone (1) store (3) straight edge (1) stretch lead (1) stringer (6) strip cutters (1) striped (2) stripes (1) stud (1) studio (5) stumbleupon (1) styrofoam (1) sugar skulls (1) supplies (4) surface tension (1) swiss cheese (1) System 96 (2) tack fuse (4) target audience (1) team (2) temperature (1) temperature controlled iron (1) temperature controller (2) temperature converter (1) tempered glass (1) template (2) tertiary colors (1) text (1) texture (2) texture molds (1) textured glass (2) THE Networking Team (2) thermal shock (1) thermocouple (5) thick glass (2) Thompson Enamels (1) threads (1) Tiffany (5) tile (1) tools (5) top load (2) torch (13) torches (3) tourists (1) tracing black (1) tracing stained glass window (1) traditional (1) traffic (1) transparency (2) transparent (1) transparent glass (1) triangle (2) triple (1) trouble shoot (2) TTV photography (1) turpentine (1) tutorial (76) tweet (2) twisted cane (1) twisties (2) twisty (1) Twitter (7) twitter secrets (1) twitter tools (1) TypePad (1) unfollower (1) Universal Mold Coat (1) upcycled glass (1) Uroboros (2) Vanilla Shell (1) ventilation (1) venting (1) vermiculite board (1) Vetrofond (1) video (88) vinegar (1) vinyl (2) viscosity (1) Vitri-Fusaille (1) Vitrigel Glass Medium (1) voltage (1) volume (1) walnut shells (1) Wasser glass (1) water jet (1) wavy bead (1) waxing (1) Wayback Machine (1) weave glass (1) weave mold (1) webpage (2) webpage development (1) webpages (1) website (1) weight (1) Weller (1) wet packing (1) wet tile saw (1) Whale Firebird (1) white (1) whiting (2) wholesalers (1) wide heart (1) widget (2) wigwag (1) window (1) window display (1) window glass (1) windows (1) wine bottle (16) wine stopper (1) wordpress (1) woven (1) yellow pages (1) Youghiogheny glass (1) YouTube (85) Zephyr ring saw (1) zinc (2) zinc came (2) zoning (2) Zoozii's (1)
By Harrach Glass ©, 2015. Powered by Blogger.
 

blogger templates | Make Money Online