• Art Glass Resources, and some business information
  • Helpful hints and tips that we find online, in books and from our own personal experiences
  • Lots of great information for Stained Glass (Tiffany and Leaded), Lampworking, Fusing, Slumping, Glass Painting, Sandcarving, Mosaics and more
  • Lastly, HARRACH is pronounced, Hair - wreck
Showing posts with label repair. Show all posts

Wednesday, October 17, 2012

Repairing a cracked or broken glass mold

#1. Magic Mender - 4 oz. container is for sale on the Slumpy's website. Use Magic Mender to repair chipped or broken slump molds. Use magic Mender to fuse two molds together. Fix hairline cracks in molds. Just apply magic mender to area to be fixed and fire at 1700 degrees F. 


Helpful Hints for Magic Mender:

While the mender is still moist, the joint will be fairly delicate, so be careful when cleaning the mold. The Menders must be fired to become permanent. Keep unused portion in jar tightly closed. The mender has a long shelf life and will not spoil! After firing, the repaired area is stronger than the rest of the mold. If you clean well before firing you’ll never know the break was there.

How to fix hairline cracks:

Use a knife tool or dermal to open the crack. (You must get the mender deep into the crack for it to work, otherwise the crack will reappear.) Dip a brush in the mender and in some water so that you have a flowing consistency. Allow the mender to flow into the cracks, then let dry. If you need a second application, do so, then clean the mold and fire.


#2. You can also use a resin based cement that is used in kiln building called "Sairset". It should be available in all ceramic suppliers.  Make the edges to be joined wet. Spread some Sairset on the joint. Wipe all of it off the working surface with a wet cloth or sponge. Back up the repair with more Sairset on the back. Wash all tools used immediately or the Sairset will never come off. When dry, fire to about 800C. , then wash the mold and you are ready to go.

Wednesday, April 11, 2012

Replacing elements on my glass kiln

I have been working on repairing my kiln for some time now.  It's finally finished!  I thought that I would repost the original post since it is quite extensive and really helpful.

http://harrachglass.blogspot.com/2012/01/repairing-my-glass-kiln.html

Saturday, April 7, 2012

How to repair broken firebrick in a kiln with kiln cement, video

This video for Paragon kiln maintenance can be easily used as a reference guide to repairing other types of kilns that use firebrick.

Monday, April 2, 2012

Evaluating Damaged Firebrick in a kiln, video

This video was made by Paragon Kilns for their kiln maintenance.  The video can also be helpful for anyone who owns a kiln that has issues with cracks in the firebrick.

Saturday, January 28, 2012

Repairing my glass kiln

The other day I was getting ready to do some fusing in my kiln, had it all set up with firing schedule set and ready to go.  I pushed the start button on my RampMaster II and my kiln barely began to start to work.  I thought about something and quickly raised the lid on the kiln to check on my glass art project when suddenly the RampMaster blew up!  It sounded like a gun shot, right next to me and needless to say, it scared the shit out of me!  I quickly shut off the RampMaster's power and unplugged the kiln.   I also noticed that smoke was coming from the RampMaster.  It totally smelled like burning electronics.

I went online to the Evenheat webpage trying to find out what to do next.  I use my kilns regularly at my studio and I need them in working order plus I paid quite a lot of money for this kiln and don't want to have to replace it with a new one. I was hoping that they'd say something about unplugging the RampMaster from the kiln and sending it in to their factory for repairs.  But their web page said that for repairs,  have a qualified electrician work on the kiln.  It sounds like an easy thing to do except when you live in a very rural area.  And after calling basically everyone that seemed qualified in the yellow pages in my area, I gave up.  

Now I am on my own.  For this reason, I thought I'd dedicate this entire post to how I am going to repair my kiln.  So I began working on it yesterday, Friday.  I can't tell anyone else how to repair their kiln especially since I have just barely begun fixing this one.  But maybe I can help someone else out there that has issues with the electronics on their kiln and not able to use it anymore.  I see some really cheap kilns listed on Craigslist occasionally and now I'm thinking they probably have an electrical issue that the owner does not know how to fix and the manufacturer won't do repairs.

To begin with, when the RampMaster blew up, I quickly unplugged the kiln from the wall and have kept it unplugged.  You don't want to start a fire or get electrocuted.  Then I unscrewed the four screws that hold the front cover on the RampMaster II.  Once done I very carefully looked into the controller to see if I could see something that looked burned.  I did see a wire that perhaps looked slightly melted (which I will look at more closely later), but more importantly I found part of the broken piece laying on the bottom of the RampMaster itself.  I carefully fished that broken part out, it wasn't easy to do since there are a lot of twisted heavy wires in there, yet I was amazed to see that the part had all of the information I needed right there!  What luck!  

This is the broken part of my kiln, the RampMaster II,  that decided to "blow up" on me!  

Here's the remains of the broken piece that I fished out of the RampMaster.

I googled Potter & Brumfield and found out that this piece belongs to a relay.   

On Monday I'll call Evenheat to order a new relay plus I'll need to get a schematic or some sort of procedure so that I know how to disassemble the RampMaster so that I can replace the relay.  I saw that to get the relay out to replace it, I'll have to remove a lot of the electronic insides of the RampMaster!   I also want to know why the relay blew up so that I can prevent that from happening again.   

Stay tuned for updates!

January 30,  Update 
Inside the RampMaster II view 1

Inside the RampMaster II view 2

Relays in the RampMaster II.

As of today, I ordered the new part from the Evenheat company.  When ordering parts for your kiln you will need to know your model number.  You can find that number etched onto the side of your RampMaster.  This unit (my kiln) has two relays sitting side by side on the bottom right in this picture. 


February 6, Update:
Still waiting for the part to arrive from Evenheat, should be here sometime early this week!

February 11, Update:
Well I replaced the broken relay with the new part that I ordered from Evenheat.  When I plugged the kiln in the LED's didn't light up so it's still not fixed.  

March 23,2012 Update:
I forgot to give my final update on repairing the kiln.  I replaced the relay and I couldn't get the kiln to work at all.  I then went and checked my breakers and....  success! 


April 1, 2012 Update:  (not an April fools joke either!)
Well the kiln worked once and a relay blew up, again!  So the other day I ordered two new relays plus some other parts from Evenheat.  Today I decided to work on the kiln.  I replaced the original relay and tested out the kiln.  The element in the lid began heating up without me even starting up a program!  I  shut it off and tried to figure out what was wrong now.  I came across this Evenheat manual for the GTS-23.  And found this paragraph:


Kiln won’t stop firing (won’t shut off)
Error Codes associated with a kiln not shutting off are E– 2 or E-4 or E– d.
Most likely a failed relay (failed closed). A failed relay may cause the kiln temperature to increase when it should be decreasing. Depending upon your 
particular kiln model you may see up to 3 relays used in its design. Identifying the failed relay is fairly simple as the element connected to it will remain on. 
Unplug the kiln and remove the kiln control panel. Simply follow the element leads to the relay to identify it. Relays are maintenance items and we 
recommend replacing all of them when needing to replace one.
Check your program. While you won’t see the error codes if you’ve programmed incorrectly this problem is possible.


After reading that, I replaced the relay that I had replaced not long ago.  And this time when I plugged in the kiln and turned on the RampMaster, it powered up correctly.

I decided to thoroughly inspect the kiln at this point since there had to be a reason why the relay I just replaced in February had died so quickly.  And that's when I discovered the culprit.  One of the elements in the wall of the kiln is broken.  Below is a pic of the bad element.


Now I'm thinking that for some reason the relay kept blowing up because of the element being broken and not making a connection.  The ends of the element in the picture above have glass on them.  The glass must have coated the element and eventually it broke right at that spot.  There is also a dark black spot below where the element is laying, I'm not sure what that is, but when I go to replace the element I will find out!

So on Monday I'll order a new element and replace it.  I will also have to gouge out the glass that melted and broke the element in the first place, since it has now melted into the firebrick.  More pics to come!


April 10,2011
I ordered two side elements from the manufacturer and received them a yesterday.  I started the element repair this morning.  Actually, it didn't take very long either!


I unplugged the kiln first.  I can't stress how important safety is, especially when working on an electric kiln!  Then I removed the front panel of the RampMaster.  I sat it on a little box so that it wasn't hanging by it's wires.  Then, as seen in the picture above I removed the wire from the top part of the element where it protrudes from the inside of the kiln.  So as not to get confused with wiring the elements (since I replaced both of them) I removed one part of an element at a time.


Above shows how I removed the element.  The top two rows of element are really just the first element, it wraps around the kiln twice.  I gently removed the old element by hand, didn't need any tools for this.


In the picture above you can see how the element is wrapped around inside of the kiln.  The element has already been removed from the top right "ledge".


Now you can see that as I removed the old element, right behind it, I put in the new element.  The new element has two long straight twisted wires that you insert through a little hole in the kiln wall.  They are the wires that protrude through the kiln wall into the RampMaster controller, where they are attached to wires in the controller itself.


When putting your new element back into the ledge, try to compress the element slightly.  I ended up with extra element when I finished installing it.  I had to then go back and refit the element more compactly into the ledge so that I didn't have any extra hanging out.  It's important to do this uniformly which isn't easy to do!  Also don't forget to make sure that the element fits correctly into the ledge, especially on the corners.


Above is the second element being replaced.  This is the spot where this element was broken by being melted completely through by a piece of rogue glass.


Above, after removing the broken element I had to remove the remains of the rogue glass (that blackish looking area) that has also melted deeply into the firebrick.  If the glass is not removed and a new element added, that glass will melt back onto the new element and eventually ruin it.  Plus that glass will melt deeper into the firebrick as well.  Unfortunately to remove that glass I had to remove the front of the lip of the ledge because I couldn't get to it.  I did that with an Exacto knife.


Above shows pieces of contaminated firebrick that I dug out of the area with a flat head screwdriver.


The picture above shows my patch job after I removed all of the melted glass.  It isn't pretty!  I could have put a piece of new firebrick in the spot and cemented that, and it would have looked much better.  Unfortunately I didn't buy any replacement firebrick and I didn't want to wait another week, again, to order more.  Instead I used my kiln cement and "glued" back the good pieces of firebrick.  I let all of the cement dry, including a few cracks and broken pieces that I repaired, then continued with the element repair.


The picture above shows the twisted wires from the new second element protruding through the kiln wall into the RampMaster.  The two thick brown wires that are connected to round pieces of spacers which are seen in the upper area of this picture (the spacers are made of the same clay material that kiln posts are shelves are made of) are the ends of the first new element that I replaced.  There are screws that hold on a brass fitting which in turn hold the twisted wires from the element together with the thick wires from the RampMaster.  The long twisted wires were cut by me, to fit exactly into the length of the brass fitting.


The picture above just shows more of the element installation process.  You can see the twisted wire before I cut it and attached the RampMaster's wires back together.

Once done I put everything back together again.  During the entire repair process I made sure to vacuum the inside of the kiln frequently.  The element instructions said to heat the kiln for three minutes to burn a coating off of the brand new elements.  Once done, I was ready to fire!

Because of all of the repair work that I have recently done, I decided to start my kiln early in the morning and monitor it often during the entire firing process.  

Tuesday, September 6, 2011

How to repair a broken piece in a leaded glass window.

Occasionally a glass artist will be asked if they can repair a broken leaded glass window but are not sure how to go about repairing the piece.  I think that repairing a leaded glass window is much easier than repairing a copper foiled window.  

To begin with you should tape together what is left of the broken piece of glass.  If necessary make a rubbing of the window.   Tape a piece of white paper on one side of the window,  lightly rub the window with a crayon or charcoal so that you can see the shadow of the lead came lines.

Next, remove the frame.  If you have a zinc came frame, you need to use a temperature controlled iron so that you can turn down the heat.  Then with the temp turned down, heat up and actually carefully move the solder from the soldered areas on the zinc came frame, use paste flux on the joint so that the solder will flow.  This will allow you to "break" or open up the soldered joints.  You'll have to do this on the corners of the zinc frame and the areas where the lead came is soldered to the zinc frame as well, remember to do both sides of your window.  Carefully remove the zinc frame from the closest side to the broken piece of glass, you might have to remove two sides of zinc came.  

Once removed, use your lead knife and cut into the closest soldered joints so that you will be able to open up the window to remove the broken piece of glass.  You will have to cut both sides of the window, in the same spots.  You might only have to cut up one area, but if the piece is large and you can't get into the broken piece, you will probably have to cut up into the window in two areas.


When you have cut both sides of lead came (only on the solder joints), front and back, up to the broken piece of glass, carefully remove or open up the window to where the broken piece is located.  Once there carefully remove the broken piece of glass with needle nose pliers.  Since the piece is cemented in place, it might take some work to pull the piece out.  Use your lead knife to clean out the lead came surrounding the once broken piece of glass.  If the lead came is damaged, you will then need to replace it.

Use the old piece of glass as a template to make a new paper pattern to replace the glass.  Place the broken piece of glass on a piece of paper, trace around it with a pencil, and cut it out with regular scissors.  Glue that piece of paper to the new replacement glass, cut, grind and its ready to replace.

If the piece of glass is too broken, or non existent,  to use as a template to make the new piece of glass, use the rubbing you made of the original window to make the new paper pattern piece.  We like to make a copy of that template first before doing anything else, just in case.  Take one copy of the etching and with regular scissors, cut out the piece or pieces that needs to be replaced.  When cutting, cut close to the center of the lead line that was traced in the original rubbing.

Once new pieces are cut and installed, re solder the once cut lead came joints.  By doing it this way, it is impossible to tell that the window has been repaired!  Then if the piece has a zinc frame, solder it back on before cementing.

Cement, clean and polish the window and it is now repaired!

Thursday, September 1, 2011

How to repair a broken piece of glass in a Tiffany (copper foil) window.

I wrote this tutorial for those artists who need to replace a broken piece of glass in a Tiffany - copper foiled window.   This technique also works for replacing multiple broken pieces.

First, place your window on your work surface with the smooth side of the broken piece of glass, facing up.  (It is much easier to cut glass on it's smoothest side.) Take your glass cutter and score (cut) multiple times through out the broken piece.  I like to cut in a criss cross star or "x" shape.

Next, hold the glass window up on it's side (if possible) and take the "ball" side of your glass cutter and tap the broken piece of glass from the opposite side from the side you just scored.  If your glass cutter doesn't have a "ball" or metal cutter fluid cap on one end, use a small hard object.  As you tap the broken piece of glass,  the new score lines that you made will break and some of the broken piece of glass will fall out of the window.

Lay the window back down on your work surface and with a pair of needle nose pliers, pull the remaining pieces of broken glass out of the spot.  Once all or most of the glass is removed from the area, use your soldering iron and heat up a small portion of the copper foil that was originally wrapped around that broken piece.  Be sure to use flux.  Take your needle nose pliers and lightly pull off the old heated copper foil at the same time that you move the soldering iron.  Some times you can remove the old copper foil in one piece!  Other times you will have to pull off small pieces of foil.  Either way, keep removing the old foil until it is all gone.  Do not over heat this area or you might break some of the good surrounding glass pieces or you could possibly damage the good foil still on surrounding pieces.

Finally, smooth out the area where the piece was removed with flux and your soldering iron.  Once done, take a piece of regular paper (like computer paper) and lay it under your window, below the area where the broken piece once was.  Take a pencil and trace around the inside of this opening.  Use a pair of regular scissors and cut out this traced piece.  Glue this new paper pattern piece on to the new piece of glass with Elmer's rubber cement.

Cut, foil and re-solder this piece back into the window.  Clean, polish and it is finished and repaired!

Monday, July 11, 2011

How to repair a leaded glass window

Repaired leaded glass on 1906 china cabinet

By Lynn Elliott

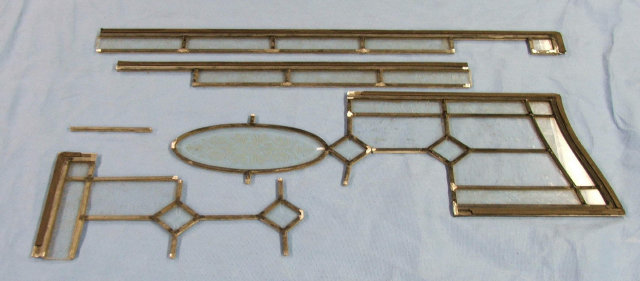
After an in-depth repair project, the leaded glass door fronting the author's built-in 1906 china cabinet looks good as new.

Looking at the missing panes and broken cames of the leaded glass doors fronting our 1906 built-in china cabinet, my husband, Todd, and I wondered how hard it would be to fix them ourselves. "Can novices repair leaded glass windows?" we asked each other. Like most old-house owners, we like the challenge of repairing our home's broken pieces—and our brick row house in Brooklyn, New York, has had plenty of parts in need of fixing. So I decided to look into the logistics of leaded glass. 

After much research and some project trial and error, I found that repairing leaded glass is possible, but it's not easy. It's a daunting task that requires a high level of skill. You need to be comfortable working with both glass and some toxic materials—it's more than just the lead that's harmful—and it also helps if you have some soldering experience. In other words, repairing leaded glass is not for the faint of heart—but it can be done. 

Step 1: Assess the Damage
Take stock of what you have to work with. Simpler patterns are easier to repair, while more complex designs—windows with a curved pattern, for example—require more dexterity. The leaded glass door on our cabinet had myriad problems: cracked glass, missing panes, broken lead came, and broken, bowing solder joints that were causing the remaining intact glass to loosen. We knew the damaged glass and came had to be completely replaced, but we tried to save as much of the old came (which has a lifespan of about 100 years) as we could. 

Assess the damage

Step 2: Prepare the Work Area and Materials
For the work surface, we laid a piece of 3/4 " plywood on a worktable and attached two furring strips (1 1./4 " x 2") at a 45-degree angle to help hold the window in place while we worked. Check that everything is squared before attaching the strips with screws. For glass-cutting, we kept a 2' section of low-pile carpet handy to work on to help prevent cracking the glass. 

Remove the trim with a putty knife

Next, you need to stretch the lead came to make it rigid enough for use. Put one end of the lead came into a vise attached to the worktable and grab the other with pliers or lead stretchers. (Tip: Cut the 6' lead strip in half so it's a manageable size.) Keep the came straight, and pull the lead so that it stretches about 1" to 1 1/2 ". Because lead came is soft and bends easily, support it with two hands when moving it. If the nubs are closed up, use a putty knife or a fid to open them. (Alternatively, you can buy stretched lead from a local supplier, as we did.) 

Remove glazing nails with pliers

Step 3: Liberate the Glass
Glass needs to be worked on a flat surface, so we removed the door from the china cabinet and took the window out of its frame. Working from the back side of the door, we gently pried the trim from the window with putty knives. Slip the putty knife between the trim and the frame, and use a gentle rocking motion to pry the trim loose. Next, pull out any remaining finish nails. 

Slide the window out of the frame

We used the putty knives to loosen the window from the frame, then slid it out onto the work surface, laying it front side down. When working on a leaded glass repair, it's best to work on the front first because lead can slip through the joints when soldering, leaving unattractive solder joints on the back of the piece. But our piece was so fragile that we decided to work on the back first and clean up any unsightly joints on the front after the window was stable enough to turn.

Step 4: Make a Template
If you have a missing pane of glass, a template can help create a replacement piece, or it can be laid underneath the window on the worktable as a guide. To make the template, take a piece of paper large enough to cover your window and secure it atop the window with tape. Using a pencil, make a rubbing of the window's design. Be sure to capture all the details before removing the template from the window. You can trace over the lines with a marker to make them clearer. For intricate windows, number and mark each piece on the template to keep track of its correct location. Measure the length and the width of the window and record them on the template. 

Make a template of the window

Step 5: Begin Repairs
Wearing safety glasses, we used a rotary tool with a 1" circular blade attachment to cut the lead joints along the left edge to access damaged areas. Cut only halfway through the joints, and be careful not to cut adjacent glass. After completing one side, flip the window to do the other side. Because our window was so brittle, we slid it slightly off the edge of the worktable, keeping the glass supported while hanging just the edge over the side, and made the cuts from underneath. (If you try this method, make sure you have a helper.) Another option is to cut a piece of plywood to fit over the window and plywood base, creating a "sandwich" that can be turned over. 

Cut old lead joints with a rotary tool

We began assembling the bowed areas—where joints were cracking and the glass was loosening from the cames—trying to save the old leadwork where we could. We cleaned out the cames with putty knives and box cutters, then tried fitting the loose glass back in the cames. Next we gently tapped the old lead came and glass back into place using the hammer and the wood handle of the putty knife or a small piece of scrap lead (hitting directly with a hammer can cause the glass to crack) and secured it with German glazing nails. The glazing nails should be lightly tapped into place so you can still move them easily. 

Step 6: Cut the Glass
When cutting replacement panes, we were lucky enough to have an intact original pane to use as a template. (If you don't have an intact piece, you can use the paper template as a guide.) Using a black marker, outline the template on the glass, then remove it. Next, score the glass with the glass cutter. Make sure to score inside the black lines; otherwise your replacement will be too big.

Hold the glass cutter between your middle and index finger, fitting it snugly against the joint between the two, and grasp the bottom with your index finger and thumb. Keep glass-cutter oil ready in a shallow bowl, and dip the cutter each time you score the glass. For straight scoring, butt the glass cutter against a ruler. Keep the cutter upright, and press firmly but not too hard, moving in a steady motion down the entire sheet. Practice on scrap glass first to perfect your technique. 

Score replacement glass

There are two ways to break scored glass. The first is to use breaker pliers, which I found easier as a beginner. Line the white line on the pliers up on your scored line and press down to snap the glass in a straight line. You also can slide the scored portion off the worktable's edge and use the rounded head of the glass cutter to tap along the scored line, then grasp the edge with your free hand and press down until the glass snaps in a straight line. Once you've created replacement panes, check the fit in the window by either comparing the panes against the template or against the remaining lead cames. 

Break new glass with breaker pliers

Step 7: Cut and Solder the Lead
Next, cut the lead came to fit. As beginners, lead nippers were our tool of choice (professionals use a lead knife). The flat side of the nippers makes a straight cut; the concave side a mitered one. Place a length of came where you need a new section. With the nippers, nick the spot where you want to make a cut—it should be slightly beyond the end of the glass to leave room for soldering—then tap the lead into place with glazing nails. 

Cut new came with lead nippers

To effectively solder old lead joints, you must expose fresh lead, either by scraping the joints with a box cutter or by using the rotary tool with a wire brush, which tends to go much faster. Whatever the method, always wear a face mask for this work, as it creates a lot of dust and scraps. Clean up afterward with a shop vacuum. 

Place came and secure with glazing nails

Next, brush flux on all joints to be soldered (flux helps solder flow freely and adhere) and on the tip of the hot soldering iron, then clean the tip on a wet sponge (you should see water when you press on it). Glass cutter cleaners—sponges in a hard plastic case—aren't very expensive, but you also can substitute an ordinary sponge in an appropriate container. 

Place the solder near the joint and melt it with the iron. Don't use too much solder, and don't extend it past the joint. In a circular motion, move the iron across the joint, smoothing the solder into and across the joint. Don't leave the iron on the joint for more than two or three seconds, or you risk melting the came. You may get solder drips on the glass, but they should easily slide or scrape off or with light scraping.

Expose fresh lead on old joints with wire brush

Check the joint—if you're unhappy with the soldering, let it cool and then work on it again, bearing in mind that the came can melt. When you're done, wipe down the window with paper towels and glass cleaner, then turn the window over and repeat the soldering process. 

Solder joints with hot soldering iron

Step 8: Cement the Window
The last step is cementing the panes in place with putty and whiting. Glazing putty has a shelf life—it should be moist with some oil showing on top. If your putty gets too hard, add a touch of linseed oil to soften it up, but don't overdo it—putty should be firm, not runny. 

Wearing latex gloves, take a ball-size portion of the putty and knead it for a minute or two. The putty will soften as you work it—some lumps are normal, but most smooth out. You can add a light sprinkling of whiting to the putty for strengthening, but we preferred the putty alone because too much whiting can dry out the putty.

Secure the panel with glazing nails, then take some putty and press it into the cames to fill spaces between the glass and the lead came. Don't put too much pressure on the window—you don't want to crack the glass. Some putty may leak through to the other side. Once you've completed the panel, clean around the seams with an awl or a fid, and remove excess putty with a little roll of the putty itself or a natural-bristle brush. 

Press glazing putting into spaces between came and glass

Whether or not you used whiting during kneading, you'll need to sprinkle some over the window at this point. Wear a face mask and sprinkle the whiting gently; try not to create a cloud of whiting dust. Next, gently spread the whiting around by moving a natural-bristle brush in a circular motion along the cames. The linseed oil should start drying up, and the lead will start to oxidize (turn darker), which is your cue to vacuum up the whiting. If there is residual oil, repeat the process with a second coating of whiting. 

Brush whiting onto the window

Take your natural-bristle brush and sweep the lead to create a dark patina. Doing this by hand can be tedious and labor-intensive, but we liked the results. A faster method mounts a bristle brush attachment on a drill. It's a good idea to break the brush in on the edge of the worktable first so bristles polish the lead instead of scratching it.

With the patina ready, we returned the window back its door frame and reattached the trim, giving our 1906 china cabinet a new lease on life.

Repaired window with dark patina

Former OHJ staffer Lynn Elliott is a copy editor for Random House Children's Books and has written numerous articles on repairing and decorating old houses.

Thursday, June 30, 2011

Videos showing a larger stained glass studio in operation!

We found this set of videos yesterday from a stained glass business, Stained Glass Resources Inc,  doing restoration on a broken leaded glass window.  It gives you an excellent idea of what a large stained glass studio, with multiple work areas in use, actually looks like!  


This is a multi part series on the restoration and repair of a Tiffany stained glass window in the Historic Calvary United Methodist Church, in Pittsburgh, Pennsylvania. This restoration work was done by the skilled artisans at Stained Glass Resources Inc. They have received awards for the work that was done to restore the Tiffany stained glass window at Calvary United Methodist Church.


Be sure to check out all of their videos, they are extremely interesting and informative!

Click here to see  http://www.youtube.com/watch?v=96I8BWtoBAk

Monday, May 16, 2011

How to repair a crack in a stained glass window with epoxy

This is an excellent tutorial that even a non-stained glass artist can use!  So next time you find a wonderful stained glass window but you are hesitant to buy it because of a hair-line fracture in a pane or multiple panes,  at least now you can try to repair it yourself!   If done correctly, the epoxy will fill in the crack so that it will not be easily visible, plus it will strengthen the broken pane of glass as well.  


updated: November 16, 2010


How to Repair a Crack in a Stained Glass Windowthumbnail
Use specially formulated glass epoxy to repair cracks in stained glass.

Cracks in stained glass windows are sometimes difficult to repair without professional conservation procedures; however, for a stained glass window installed in a window frame and possessing only minor cracking, it is possible to repair the crack, at least temporarily, without dismantling the window. Using an epoxy commonly used by historical building restoration companies, the crack can be sufficiently repaired. According to the Building Conservation Directory, it is important to keep in mind that the epoxy used to repair the crack will break down in the sunlight over a long period of time.


Materials Needed:

Hxtal NYL-1 epoxy, or another UV light-resistant glass restoration epoxy
2 glass medicine droppers
Glass mixing container
Glass mixing rod
Self-adhesive forehead thermometer strip
Hair dryer
Toothpick or orange stick
Cotton rag
Razor blade

Instructions:

    • 1
      Mix the two parts, part A and part B, of the liquid epoxy by using glass droppers to add one part B to three parts A in a glass mixing container. Use a glass mixing rod to stir the two parts together. According to Talas, Hxtal NYL-1 is the only epoxy that won't discolor when exposed to UV light.
    • 2
      Stick a self-adhesive forehead thermometer strip onto the glass window near the crack so you can see the temperature of the glass.
    • 3
      Hold a hair dryer, set on a low heat setting, about 2 feet from the window glass. Heat the crack and the surrounding area to about 120 degrees Fahrenheit. Don't heat the glass quickly or let it get to a hotter temperature than 120 F. Gradually warm the glass.
    • 4
      Drop the epoxy into the crack using a glass dropper. If your window can be removed or can open at a tilt, this will simplify your repair, as you can drop the epoxy directly into the crack. If your window is installed upright, push the dropper as close to the crack on the surface of the glass as possible. Hold a toothpick or orange stick, a stick with tapered ends, beneath the crack and as you drop the epoxy, guide the adhesive into the crack with the toothpick or stick. Talas reports that the epoxy will soak into the crack very fast and will make finer cracks completely disappear.
    • 5
      Wipe away excess epoxy with a rag. Allow the repaired stained glass to sit undisturbed for at least 1 week. According to Talas, at a temperature of 75 degrees Fahrenheit the epoxy will reach about 90 percent of its bonding strength.
    • 6
      Scrape any excess dried epoxy from the glass with a razor blade after 12 hours have passed. Do not use any sort of cleaning product. After 24 hours, the epoxy can't be removed easily.


SEARCH FOR ART GLASS INFO!

Follow Our Blog

Blog Archive

These are some of our most popular subjects

50/50 solder (2) 60/40 solder (2) Borax (2) Boron Nitride spray (3) Bullseye (5) COE (11) Dalle de Verre (2) Didymium glasses (2) Effetre (2) Evenheat (4) Glass Eye 2000 (2) Moretti (3) Morton System (3) Primo Primer (3) RampMaster II (2) Tiffany (5) YouTube (85) air bubbles (5) annealing (6) art glass (10) bead (8) beads (6) bottle (8) breaking glass (2) broken pane (2) came (2) carbide wheel cutter (2) casting (10) cement (10) chat (1) color (2) compatible (2) compatible glass (4) contour fuse (2) copper (4) copper foil (7) crushed glass (3) cutting (8) cutting circles (2) cutting glass techniques (2) dalles (3) design (7) devitrification (5) devitrification spray recipe (2) dichroic (9) digital controller (4) dots (4) drill hole in glass (3) enamel (6) enamel paints (2) encase (3) epoxy (2) etching (5) faceted glass (3) fiber paper (7) fid (2) fire brick (4) fire polish (2) fire safety (2) firing schedule (26) flashed glass (2) flux (8) foil (7) frit (25) full fuse (6) furnace glass (3) fused glass (26) fusing (72) glass (33) glass bead (5) glass blowing (3) glass bottles (5) glass casting (9) glass clay (3) glass cutter (8) glass cutting (4) glass kiln (10) glass painting (18) glass powder (6) glass rod (9) glass stain (3) glue (3) grinder (3) grinder bits (2) grout (2) hake brush (2) harrach glass (158) hot glass (5) hot head (3) how to set up a torch (2) jewelry (4) jewels (3) kiln (106) kiln furniture (3) kiln schedule (20) kiln shelf (3) kiln wash (15) kilns (7) lampwork (47) lampwork press (2) lampworking (8) lead came (11) lead knife (3) leaded glass (12) mandrels (4) mold (13) molds (17) mosaic (6) oxidation (1) pate de verre (5) patina (2) pattern (5) pattern bars (6) pendant (7) pot melt (5) powder (1) presses (3) reactive colors (2) recycled glass (9) reducing flame (2) repair (10) resist (6) restoration (3) reusche (5) safety (7) sandblasting (6) schedules (4) score glass (3) sheet glass (5) shelf paper (4) shelf primer (6) slumping (14) soft glass (4) solder (10) soldering iron (4) stained glass (22) stained glass window (7) steel mold (3) stringer (6) supplies (4) tack fuse (4) thermocouple (5) tools (5) torch (13) tutorial (76) video (88) wine bottle (16)

Search tags from previous posts here!

104 coe (1) 220 volt (1) 50/50 solder (2) 60/40 solder (2) Aanraku Frit Maker (1) Aanraku Frit Sorter (1) abrasive (1) accent (1) acids (1) advertise (6) agreement (1) air bubbles (5) air compressor (2) aluminum oxide (1) android (1) annealing (6) aperature pour (1) app (1) Arrow Springs (1) art (3) art glass (10) ArtGlass Clay (1) artist (2) avatar (2) Banner (2) bar code scanner (1) Baroque (1) base metals (1) bead (8) bead door (1) bead release (1) bead release recipe (1) beads (6) beer bottle (4) bending glass (1) Bethlehem (1) Betta (1) betterstainedglass.com (1) bevels (1) bgartman (1) billet (1) billets (2) bisque (1) black (1) black backed foil (1) Blenko (1) blog (7) blogger (3) blowing (1) Bobcat (1) books (2) Borax (2) Boron Nitride spray (3) Borosilicate (1) bottle (8) bottle cutter (3) bottle glass (1) bottles (1) boxing (1) brass (1) brass frit (1) breakers (1) breaking glass (2) brick and mortar (1) broken pane (2) bronze (1) building owner (1) Bullseye (5) Bullseye powder (1) Bullseye reactive glass chart (1) business (6) business license (3) butterfly (1) buy (1) cabbage leaf mold (1) came (2) came bender (1) came saw (1) camera (1) candles (1) candy dishes (1) cane (1) Canterbury Cathedral (1) carbide wheel cutter (2) Carlisle (1) Cast-A-Cab Molds (1) casting (10) Cathedral glass (1) Catspaw (1) Celsius (1) cement (10) cement recipe (1) ceramic kiln (1) ceramic mold (1) chain (1) change shop name (1) Chantal's stained glass (1) chat (1) Cheetah (1) Chestnut Ridge Designs (1) chunk glass (1) circle (3) clashing (1) clay (2) clean (1) cleaning copper (1) clove oil (2) cmc (1) CMC powder (1) coaster (1) Coatings by Sandburg (1) COE (11) COE testing card (2) color (2) color wheel (1) Colour de Verre molds (2) commercial (1) compatible (2) compatible glass (4) competition (1) compounds (1) conservation (1) contact paper (1) contour fuse (2) cookie cutters (1) cool (1) copper (4) copper backed foil (1) copper foil (7) copper foil mil (1) copper sulfate crystals (1) copper wire (1) cord (1) Corinabeads (1) Corning Museum of Glass (2) corporation (1) cracked pain (1) crackle glass (1) cracks (1) crafts (1) craigslist (1) Creative Paradise molds (1) Creator's Premium Bottle Cutter (1) Crowley (1) crushed glass (3) curdled (1) custom ceramic molds (1) cut outs (1) cutting (8) cutting bottles (3) cutting circles (2) cutting glass techniques (2) cutting oil (1) cutting square (1) Dalle de Verre (2) dalles (3) dam (1) Danielle Moore (1) decals (1) Delphi Glass (1) design (7) devitrification (5) devitrification spray recipe (2) dichroic (9) Dichroic Extract (1) Didymium glasses (2) digital controller (4) disk bead (1) display (1) disposal (1) distorted fused glass shape (1) domain (1) door (1) Dos and Don'ts (1) dots (4) dragon scale bead (1) drapery glass (2) draping (1) drawing (1) Dremel (2) drill hole in glass (3) drinking glasses (1) drop out ring (1) dust collector (1) dusts (1) dykes (1) earrings (1) Effetre (2) electric kiln (1) electric kiln sitter (1) electricity (1) element (2) elements (2) elmers rubber cement (1) enamel (6) enamel label (1) enamel paints (2) enameling (3) encase (3) encased (2) English Muffle (1) engrave (1) entrepreneur (4) epoxy (2) equipment (1) etching (5) Etsy (7) Etsy card reader (1) Evenheat (4) evenheat kiln (1) expenses (1) exposure (1) facebook (6) faceted glass (3) Fahrenheit (1) fan page (1) favorite item from the shop above you (1) feathered lampwork bead (1) feature your artwork (1) fiber board (2) fiber paper (7) fid (2) fire brick (4) fire polish (2) fire safety (2) firebrick (2) firing schedule (26) first firing (1) fit glass window to frame (1) flash (1) flashed glass (2) Flexi-Glass (2) float glass (1) floral former (2) flower (1) flower pots (2) flux (8) foil (7) foil shears (1) follower (1) following secrets (1) font (1) font generator (1) for sale (1) forum (1) Fracture and Streamer (1) frame (1) Frantz (1) free stained glass patterns (1) freeze and fuse (1) frit (25) frit casting (1) frit casting molds (1) frit crusher (1) frit sorter (1) front load (1) full fuse (6) fumes (1) furnace glass (3) fuse (2) Fuse It Test Card (1) fused (13) fused glass (26) fused glass decals (1) fused hearts (1) fused lamp (1) Fusemaster (1) fusible (2) fusing (72) fusing book (1) fusing medium (1) gain followers (2) garnet (1) general proprietorship (1) generator (1) gift (1) gigabytes (1) gingerbread man (1) Glaskolben (1) glass (33) glass bead (5) glass beads (3) glass blowing (3) glass bottles (5) glass burrs (1) glass casting (9) glass clay (3) glass cutter (8) glass cutting (4) glass cutting safety (2) Glass Eye 2000 (2) glass kiln (10) glass log (1) glass nippers (1) glass painting (18) glass powder (6) glass rod (9) glass saw (1) glass stain (3) glassline paint (1) glazing hammer (1) glue (3) Gluechip (1) goddess (1) google (1) grain (1) grinder (3) grinder bits (2) grinding glass (1) group (1) grout (2) grozing (1) Gryphon (1) Gryphon bandsaw (1) Gtt Cricket (1) gum arabic (1) haike brush (1) hake brush (2) Hakko (1) handkerchief mold (1) hang (1) hanging hook (1) Hanging Valley Art Glass (1) harra (1) harrach glass (158) harrachglass (2) hazardous waste (1) history (1) hobbies (1) holding agent (1) hollow bead (1) home made frit (2) home owners association (1) Horkover Glass (1) horseshoe nails (2) hot (1) hot glass (5) hot head (3) hot working (1) house sign (1) how to (2) how to clean (2) how to open a new store (1) how to set up a torch (2) HTML (2) IGGA (1) incompatible glass (1) info appearance (1) Inland (1) installation (2) insurance (1) internet (3) iPhone (1) IR damage (1) Iridescent (1) iridized (1) ivory (1) japan drier (1) jar (1) jars (1) Jennifer Geldard (1) jewelry (4) jewels (3) joist (1) jump ring (1) Kaiser Lee Board (1) Kalera Stratton (1) Katie Gee Designs (1) kiln (106) kiln book (1) kiln furniture (3) kiln lid (1) kiln repair (1) kiln schedule (20) kiln shelf (3) kiln wash (15) kilncasting (1) kilnformed (1) kilns (7) Knight Bullet (1) Kokomo (3) Kokomo glass (1) label (3) Lamberts (1) lamp (1) lampwork (47) Lampwork Etc. (3) lampwork press (2) lampworking (8) lampworking frit (1) landlord (1) LavaCloth (1) lavender oil (1) layout (1) lead (4) lead came (11) lead knife (3) lead nippers (1) lead shears (1) lead vise (1) leaded (1) leaded glass (12) lease (2) leaves (1) lids (1) limited liability company (1) limited liability partnership (1) limited partnership (1) linseed oil (1) liquid stringer (1) liquid stringer medium (1) Lisa Horkin (1) live (1) location (1) lost wax casting (1) Lynx (1) magazine (1) Magic Mender (1) mandrel size chart (1) mandrels (4) manual (2) manufacturers (1) market (1) marketing (1) measure (1) melting points (1) merchant service (1) metals (2) microwave (1) microwave kiln (2) minerals (2) mini phaser (1) mirror (1) mold (13) mold mix 6 (1) molds (17) Moretti (3) Morton board (3) Morton System (3) mosaic (6) mosaic history (1) mouth blown (2) MR-97 (1) Mr. Splash (2) Muff (1) Murano Italy (1) muriatic acid (1) Mustang Dawn (1) Naos (1) needle nose (1) negotiate (1) net (1) network (1) network team (1) neutral flame (1) neutrals (1) newspaper (1) NNN (1) no days liquid fusing adhesive (2) noodles (2) Nortel (1) nuggets (2) off mandrel (1) oil based (1) online (1) onsite (1) opalescent glass (1) opaque glass (1) organizations (1) outlet (1) oval (1) oxidation (1) oxides (1) oxidizing flame (1) oxygen (2) oxygen concentrator (1) packaging (1) paint (3) panel (2) paradise paints (1) Paragon (2) parts (1) pate de verre (5) patina (2) pattern (5) pattern bars (6) pattern shears (1) patterns (3) Patty Gray mold (1) paypal (1) Pebeo (1) peep hole (1) pen (1) pencil grip (1) pendant (7) pendant mold (1) permits (1) petals (1) Peter McGrain (1) Phantom (1) photography (4) pine oil (1) Pinterest (1) Piranha (1) pistol grip (1) plaster (5) plastic beads (1) plating (1) Play Doh Fun Factory (1) pmc (1) pocket vase (1) poison (1) posts (3) pot drop (1) pot melt (5) powder (1) power cord (1) preparing kiln (1) presses (3) pressure blaster (1) pressure pot (1) pricing (1) primary colors (1) Primo Primer (3) printable (1) profile (2) program (3) programmable (2) propane (3) proper clothing (1) propylene glycol (1) psi (1) punty (1) purple (1) putty (2) putty recipe (1) pyrometer (3) qr (1) qr code (1) rain drops (1) raking (1) raku (1) ramp (1) rampmaster (2) RampMaster II (2) reactive colors (2) recipe (1) rectangle (1) recycle (5) recycled glass (9) Red Max (1) reduce air bubbles (1) reducing flame (2) reference (2) relay (2) rent (1) repair (10) residential (1) resin (1) resist (6) resources (1) restoration (3) retail (4) reusche (5) reverse painting (1) Rio Grande (2) rod (1) rod storage (1) rods (1) rondels (1) roulette tool (1) round bead (1) rubber (1) rubber cement (1) rubbing alcohol (1) running pliers (1) s hook (1) safety (7) safety glasses (3) Sairset (1) sand (1) sand blaster (4) sand blasting (5) sand carving (4) sandalwood amyris oil (1) sandblasting (6) Sandblasting abrasives (1) sander (1) saw (1) schedules (4) score glass (3) scoring glass (1) scrap glass (1) Scrap Master (1) screen printing (1) secondary colors (1) sections (1) secure server (1) Seed beads (1) segments (1) sell art work (1) sell crafts (1) service provider (1) serving plates (1) shapes (1) shards (1) sharpie marker (1) sheet glass (5) shelf melt (1) shelf paper (4) shelf posts (1) shelf primer (6) shipping (1) shop (1) shop announcement (1) shop languages (1) shop name (1) shop policies (1) shop profile (1) shop settings (1) shop title (1) sifter (1) silicon carbide (1) silicone mold (2) silicosis (2) silver (2) silver backed foil (1) silver foil (1) silver stain (2) silvered ivory (1) sink (1) sis (1) Skutt (3) slump (8) slumping (14) Slumpy's (3) small business (3) snowman (1) social media (3) soda lime glass (2) soft glass (4) software (3) solder (10) soldering iron (4) sole proprietorship (1) spectrum (1) Spectrum system 96 (2) Squeegee Oil (1) St. Just (1) stained glass (22) stained glass painting (1) stained glass pattern books (2) stained glass patterns (2) stained glass studio (1) stained glass window (7) stainless steel mold (4) stains (1) stamps (4) steel mold (3) steel pipe (1) Steider Studios (1) Steider Studios Glass Medium (1) stemware (1) stencil (3) stepping stone (1) store (3) straight edge (1) stretch lead (1) stringer (6) strip cutters (1) striped (2) stripes (1) stud (1) studio (5) stumbleupon (1) styrofoam (1) sugar skulls (1) supplies (4) surface tension (1) swiss cheese (1) System 96 (2) tack fuse (4) target audience (1) team (2) temperature (1) temperature controlled iron (1) temperature controller (2) temperature converter (1) tempered glass (1) template (2) tertiary colors (1) text (1) texture (2) texture molds (1) textured glass (2) THE Networking Team (2) thermal shock (1) thermocouple (5) thick glass (2) Thompson Enamels (1) threads (1) Tiffany (5) tile (1) tools (5) top load (2) torch (13) torches (3) tourists (1) tracing black (1) tracing stained glass window (1) traditional (1) traffic (1) transparency (2) transparent (1) transparent glass (1) triangle (2) triple (1) trouble shoot (2) TTV photography (1) turpentine (1) tutorial (76) tweet (2) twisted cane (1) twisties (2) twisty (1) Twitter (7) twitter secrets (1) twitter tools (1) TypePad (1) unfollower (1) Universal Mold Coat (1) upcycled glass (1) Uroboros (2) Vanilla Shell (1) ventilation (1) venting (1) vermiculite board (1) Vetrofond (1) video (88) vinegar (1) vinyl (2) viscosity (1) Vitri-Fusaille (1) Vitrigel Glass Medium (1) voltage (1) volume (1) walnut shells (1) Wasser glass (1) water jet (1) wavy bead (1) waxing (1) Wayback Machine (1) weave glass (1) weave mold (1) webpage (2) webpage development (1) webpages (1) website (1) weight (1) Weller (1) wet packing (1) wet tile saw (1) Whale Firebird (1) white (1) whiting (2) wholesalers (1) wide heart (1) widget (2) wigwag (1) window (1) window display (1) window glass (1) windows (1) wine bottle (16) wine stopper (1) wordpress (1) woven (1) yellow pages (1) Youghiogheny glass (1) YouTube (85) Zephyr ring saw (1) zinc (2) zinc came (2) zoning (2) Zoozii's (1)
By Harrach Glass ©, 2015. Powered by Blogger.
 

blogger templates | Make Money Online